Sunday, November 13, 2011

Hanging Out

Strange as it may seem, I love doing laundry.  I love the smell of clean clothes and the warmth of just-dry garments.  I love how line-dried things have a crispness that can't be imitated.  So it should come as no surprise that one of the very first projects Aaron and I talked about when we bought our lovely house was the installation of a DIY clothesline.

The way our backyard is laid out was making our decision on where to place the drying line a bit of a conundrum.  We didn't want to divide the grassy area into different parts and we didn't want to obscure the view of the pretty plants and flowers bordering the lawn.  We also needed to make sure we didn't block the paths to our vegetable garden, our back patio, or the covered porch and gardener's shed.  For many months we were left scratching our heads, but enough tipped-over-portable-drying-rack mishaps led us to a major brainstorming session.  Aaron eventually came up with the idea to attach a folding-arm system to our masonry wall on the side of the house.

As many of you know, we were left with a strangely large menagerie of 'left-overs' from the previous owners of our house, including hardware, furniture, and lumber, among other things.  After browsing through our collection of misfit pieces, we decided on some perforated angle iron (I think that's the technical term for it anyway...) to get our project going.  Aaron took the reins on this project and from there on the only thing I did was help with some rust-proofing.

Before I knew it Aaron had the plans drawn up and most of the metal cut.  We weren't able to source all of our project materials from the 'left-overs' so a trip to the Home Depot was next on our list.  (We love going to the hardware store!)  More cutting and the temporary construction ensued.  We needed to seal the metal so after all the pieces were cut and put together we took it all apart and readied it for painting.

The metal we were using was pretty rusty, so a thorough sanding and several coats of a rust-proofing paint was the next step.   (Afterwards I read on the paint website that a light sanding is plenty of preparation for the specific paint we used, but at least we got a good workout; sanding rusty metal to a pseudo-shine is hard!)  After the paint had plenty of time to cure our friends Mike and Ren came over and Mike helped Aaron hang the contraption.  I hung the line and used it a few days later.


On first using it we figured out a flaw in the plan.  The weight of the wet clothes was pulling the arms together (and out of square).  We needed to devise a way to add some lateral rigidity between the arms.  We quickly realized that another piece of the angle iron across the front would provide just the rigidity we needed.  A quick sanding and some more painting were completed and the arms were attached.


The clothesline now functions perfectly!  My favorite part of the whole thing is that the racks fold down when not in use.  They are also placed against a wall which means they are using a space that would otherwise have been unused.  The masonry wall also provides a source of natural heat that helps the clothes dry even faster!  The lines are also just out the back door which is right next to the laundry area inside; I can easily move between the washing machine and clothesline.  You can now count me as one happy laundress!

P.S.- Don't pay attention to the explosion of weeds that occurred when we went on a week-long road trip.  They've taken over the whole yard!

Saturday, November 12, 2011

Backyard Bonanza!

So I started writing this post in June after a couple of visits from Aaron's mom, Robin, and then Aaron's dad, Steve.  I admit, I dropped the ball on this one.  There was just so much change taking place in our backyard that I wanted to wait for the finished project to post about it.  I have finally learned that a backyard is never officially done.  There is a continual change taking place at all times.  That's nature, right?  So I'm going to post a bunch of pictures of a few yard projects we've tackled in the time between June and now.


First up is a small-ish project I attacked on my own.  I simply dug out a small garden running along the patio off the back door.  I only got about halfway done when I realized the soil was probably not the best place to try to grow anything without some major amendment.  Once the second project I'm about to tell you about was complete I went back to this one and got it finished out and planted a bunch of volunteer tomato plants there.


Second on the list was the back corner vegetable garden project.  When Robin was here visiting in May (a time we like to call Gardenstravaganza) we did our first major weeding of the yard and flower beds.  We also bought a tiller and started getting our future garden dug up and amended.

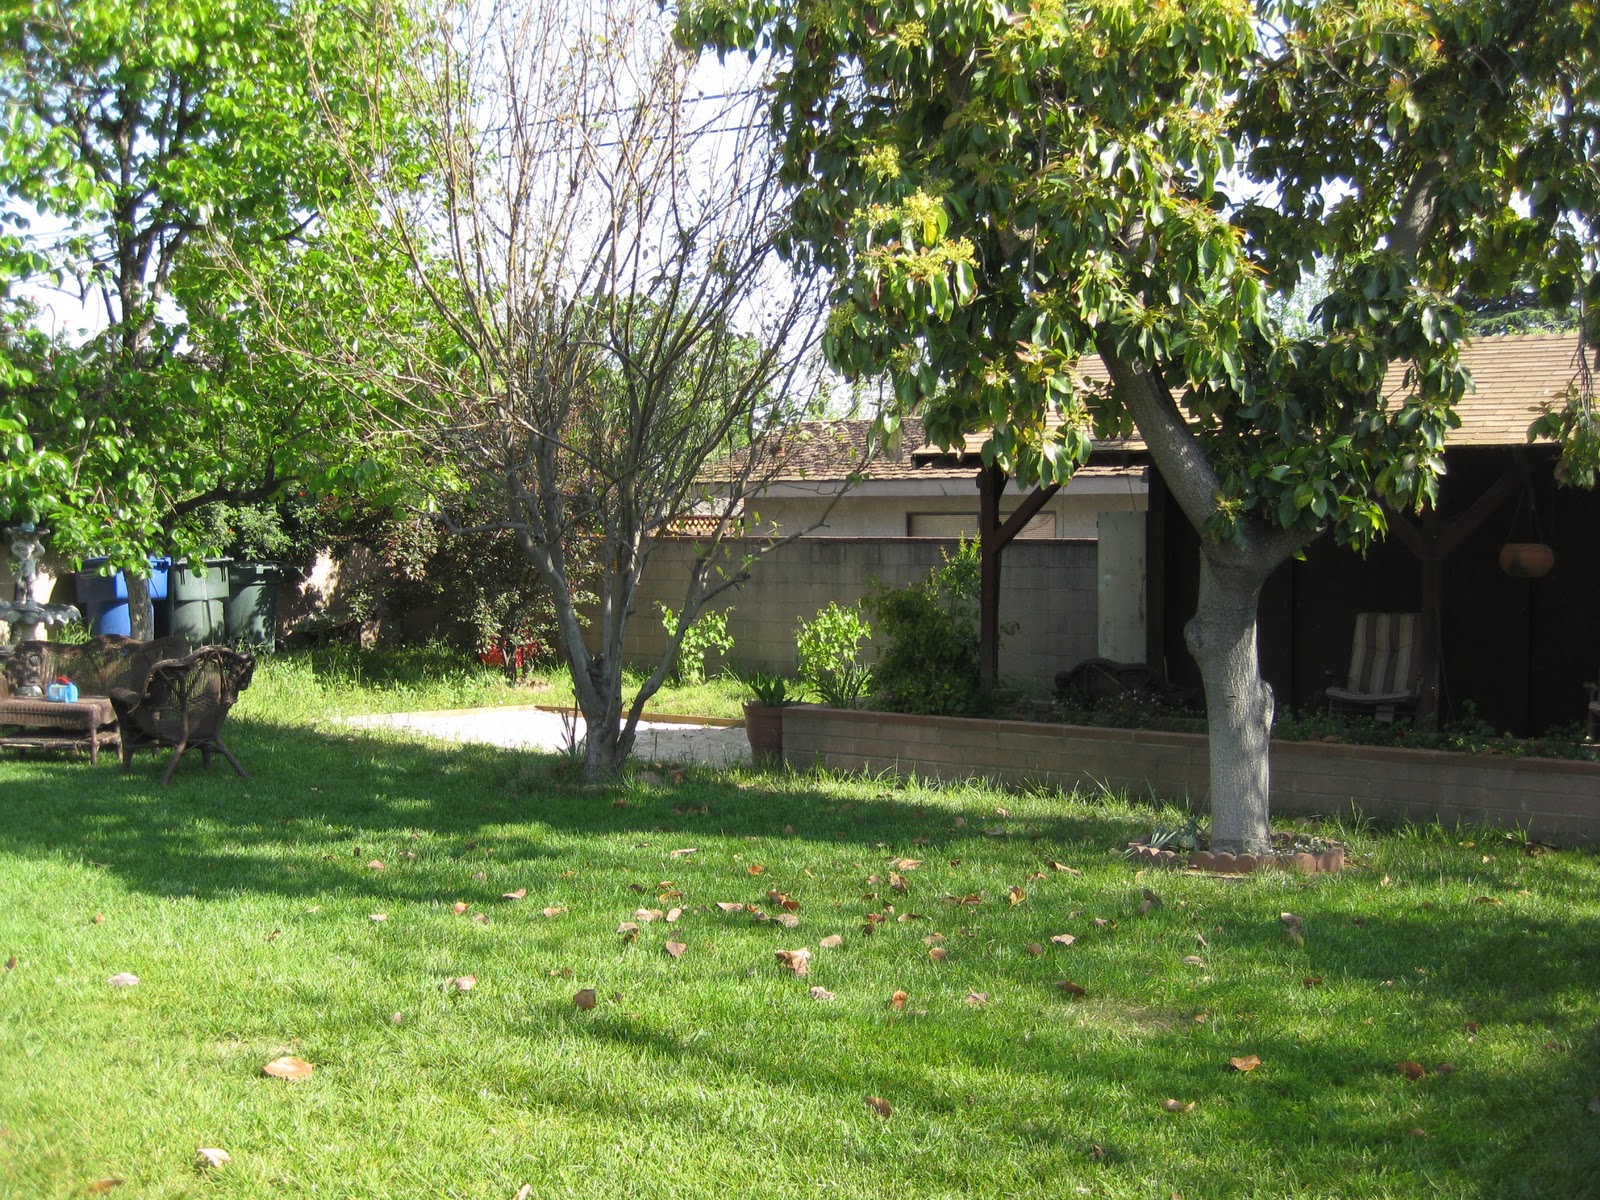
We are totally unlucky in the soil department here; ours is very hard packed and super dry.  When watered, the water runs off or just sits on the top rather than soaking in so some major work was needed to prepare for the veggies, fruits and herbs.  Robin got us started with some plants that I planted after she had gone.  While she was still in town we also mulched many of the flower beds with cedar mulch.  If you look carefully in the first picture you can see what a mess the back corner of our yard was.


Before planting the veggies and herbs I needed to build a short retaining wall as our garden site was on an incline.  The previous owners left us a large stack of bricks so I planned on using those to build the wall with.  I dug out what would be the lower level and made sure it was level before I set the first row of bricks in.  After that I just  staggered the brick placement and waited for Aaron to get home.


I knew we needed a way to hold the bricks together, but I really didn't want to use mortar, so I hoped Aaron would have something better in mind.  We  didn't come up with much on our own, but a quick trip to the Home Depot revealed a new favorite product: masonry epoxy.  It comes in a caulk-style tube that we popped into our caulking gun and went to work with.  Our wall was glued together in no time and the best part is that water has a path to run through rather than being held in the upper level of the garden which may have been the case with mortar.  I quickly got the plants in the ground and our garden was ready to grow!

Soon to come: a current picture of the garden all planted up!

The third project to report is one that Steve helped us with when he was visiting in June.  When we moved into our house there was a large sand pit framed out in the backyard that we were told was an abandoned project.  The former owners had planned a brick patio (which was why there was a huge stack of bricks left in the backyard), but we had other plans for the brick and wanted a different style of patio.  For the first couple of months all the cats in our neighborhood used the sandpit as a large litter box so we knew we needed to get something put in quickly.

I had chosen a few inspiration pictures from Pinterest and we knew we wanted to incorporate square pavers, pebbles and a fire bowl like these:

 I sourced the large 24" square pavers, but they were pretty expensive compared to easy-to-get 12" square pavers from Lowe's.  We eventually decided to top our cinderblock bench with the large pavers and opted for the 12" pavers for the ground cover filled in with river pebbles.  Once I had a plan drawn out we borrowed Aaron's company truck (with a lift gate!) and made a one-stop-shop at Lowe's to purchase the cinderblocks, pavers and pebbles.

When we got back home with our materials  Aaron and Steve got to work leveling and tamping the sand to form our base for our new patio.  I think it is appropriate to mention here that below the sand was the black blocker material and a layer of concrete rubble.  We were spared a lot of work with that already being dug out and in place for us.  I began unloading the cinderblocks from the truck and was about three quarters of the way done when our friends Ren and Mike showed up to help! (Yeah, we owe them big time!)  Mike went back to join the guys while Ren and I finished getting the cinderblocks out of the truck bed and then to the backyard.

 
Once the sand was level and ready the first layer of cinderblocks went down.  Again, we used our miracle masonry epoxy to affix the second layer of blocks to the first and the 24" pavers to the top.  While Mike and Aaron built the bench  Ren and I brought the 12" pavers to the backyard and Steve laid the 12" pavers in a simple hatch pattern on the sand. Finally we filled in the blank space with the pebbles and swept them into place.  It was tough work, but we all had a good time and the patio we have to enjoy was well worth it.


We had decided not to make a fire bowl out of concrete after going back and forth for a while prior to the start of the project.  I loved the look of it, but it just didn't end up being very practical for us.  Some cons were that we probably couldn't lift it to empty the ashes into our compost heap and most tutorials said that the wood shouldn't directly touch the concrete while burning and we couldn't see a way around that.  So it was back to the drawing board.  My second choice was purchasing a 30-quart stainless steel salad prep bowl from a restaurant supply store.  That idea was put on hold until Robin came back to visit us and prompted a trip to the restaurant supply store.  Once there we found a large steel wok with handles that was much cooler than a salad bowl.  Robin treated us to the wok and some piñon wood for our first backyard fire. 

Coming soon: A picture of the completed project.

Overall, our garden this year included:
Basil
Dill
Mint
Cilantro
Oregano
Rosemary
Lemonbalm
Chives
Onions
Bell Peppers, red and yellow
Jalapeños
Serrano Chiles
New Mexico Chiles 
Purple Table Grapes
Plums
Apples
Avocados
Persimmons
Blueberries
Pumpkins, although a large first batch of them died a while back and now I've got two new plants exploding with growth, but no fruit yet.
Tomatoes, Mr. Stripey, Celebrity, Black Prince, and volunteer Romas and the on-the-vine variety from the store.  We also have a cherry tomato plant that has just started growing and has some small green fruit on the vine, but I fear I'll lose the plant to the cooling weather before we get any ripe fruit from it.


Hopefully I'll get some current photos posted soon so you can see how far we've come in only seven months!
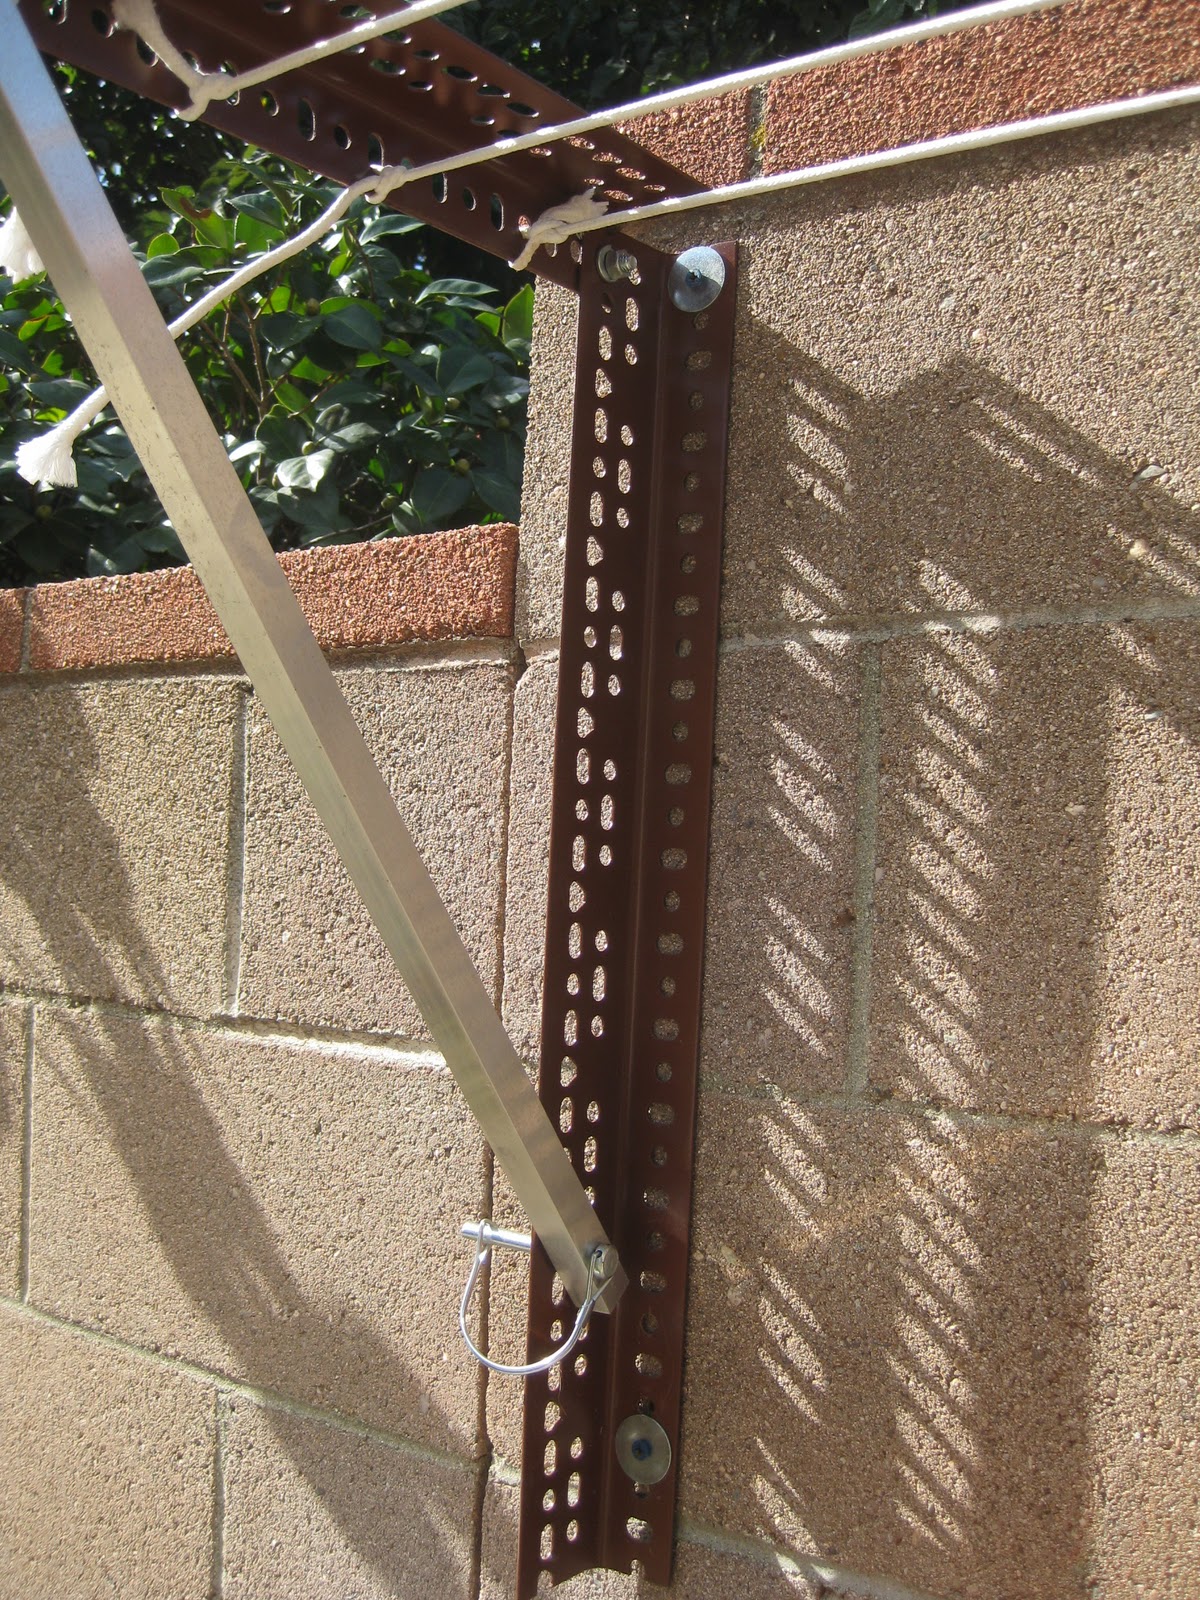
Monday, October 3, 2011

Coming Soon

We have a lot of projects in the works right now and none of them are completely finished.  (Is any house project ever completely finished?)  We've been hard at work, but three straight weeks of guests, school work, and an upcoming roadtrip have put a little crimp in the work schedule.  Here are a couple of things to keep your eyes peeled for in the near-ish future:

-A front porch spruce-up
-Aaron's clothesline project
-A revamped hallway
-A six-month one year photo update
-A backyard overhaul

Monday, August 29, 2011

So We Sailed On To The Sun...


The dining room has finally come together! Yes, it still needs a few tweaks, but for now it is done.  This project took much longer than expected.   It started in mid-April, only a few short days after we moved in.  Skip ahead to late-August and it is nearing completion.  See the progression of the project in photos and read all about it after the jump!


Here is the room we started with.  The second we stepped into the house we knew the wallpaper would be coming down.I wouldn't have started peeling the paper down so quickly if it wasn't already peeling on its own (or if I had known the project in store for me).  I've removed wallpaper before so I was pretty confident that this project would take a week or so.  I was an insider and I had all the right tricks up my sleeve; this would be a cinch.  Oh, was I wrong!  As expected, the plastic-y overlay came off really quickly and I got down to the paper backing within the first day.  After that, I ran into trouble.


Apparently, I was not the only one to notice the peeling parts.  It seems the previous owner tried to 'fix' this problem by super-gluing the edges of each sheet down.  Needless to say, I wasn't expecting super-glue.  The middle of the sheets came down with minimal effort, but oh, those edges; they wouldn't budge. 


We spent two months with a dining room that looked like something you might find in an old dilapidated house, not one someone was living and entertaining in.  Luckily, our friends didn't care that they were eating in a room with exposed, water-stained plaster walls and half-peeled wallpaper.

In late June Aaron's dad, Steve, came to town and helped me finish getting the last tiny scraps of wallpaper removed.  We had already tackled a fairly large outdoor project earlier in his stay here, but he wasn't finished helping out.  He sanded the walls down and helped me get the room painted!  He even caulked around the wainscoting and crown moulding!  The paint color was one we chose years ago and had painted our living room with in Oklahoma.

For those interested, the color is Behr's Sahara Shade. Aaron and I found a new light fixture and purchased a new and bigger table and that is how we got to where we are now.Future projects in the room include replacing the window with french doors, centering the light fixture over the table, and building end seats for the table.  But for now, it is done and we are both very happy with the results!

Sunday, July 31, 2011

Fresh Off the Vine

It has been a good week here.  Our grapes growing in the garden came up ready to pick and pick them we did!  The only problem with growing grapes (and this holds true for many fruits and veggies) is that they're almost all ready at exactly the same time, which means we had a ton of grapes sitting in our kitchen all week.  We ate some and then we needed to figure out what to do with the rest.


After looking at grape jam recipes I had the idea to search for a grape pie recipe.  Sure enough, I found a few that looked promising.  After browsing through commentors' tips I decided which steps to include in my own recipe.  The crust actually took the longest, as it needed to chill for at least an hour, but the filling came together really easily while the dough was chilling.  After I rolled out the crusts the filling went into the pie.  It was a beautiful color!


The pie baked for around 45 minutes and came out beautifully!


Grape Pie Filling 
and  
Perfect Pie Crust (from Elise on Simply Recipes)


Perfect Double Pie Crust Recipe

Prep time: 1 hour, 15 minutes

Ingredients

  • 2 1/2 cups all-purpose flour, plus extra for rolling
  • 1 cup (2 sticks or 8 ounces) unsalted butter, very-cold, cut into 1/2 inch cubes
  • 1 teaspoon salt
  • 1 teaspoon sugar
  • 6 to 8 Tbsp ice water


Directions

1.  Combine flour, salt, and sugar in a food processor; pulse to mix. Add butter and pulse 6 to 8 times, until mixture resembles coarse meal, with pea size pieces of butter. Add ice water 1 Tbsp at a time, pulsing until mixture just begins to clump together. If you pinch some of the crumbly dough and it holds together, it's ready. If the dough doesn't hold together, add a little more water and pulse again.

making-dough.jpg

2.  Remove dough from machine and place in a mound on a clean surface. Gently shape into 2 discs. Knead the dough just enough to form the discs, do not over-knead. You should be able to see little bits of butter in the dough. These small chunks of butter are what will allow the resulting crust to be flaky. Sprinkle a little flour around the discs. Wrap each disc in plastic wrap and refrigerate at least 1 hour, and up to 2 days.

pie-crust-crumbles.jpgpie-crust-disc.jpg

Use this time to make the pie filling (recipe below).

3.  Remove one crust disk from the refrigerator. Let sit at room temperature for 5-10 minutes in order to soften just enough to make rolling out a bit easier. Roll out with a rolling pin on a lightly floured surface to a 12-inch circle; about 1/8 of an inch thick. As you roll out the dough, check if the dough is sticking to the surface below. If necessary, add a few sprinkles of flour under the dough to keep the dough from sticking. Carefully place onto a 9-inch pie plate. Gently press the pie dough down so that it lines the bottom and sides of the pie plate. Use a pair of kitchen scissors to trim the dough to within 1/2 inch of the edge of the pie dish.

4.  Add filling to the pie.

5.  Roll out second disk of dough, as before. Gently place onto the top of the filling in the pie. Pinch top and bottom of dough rounds firmly together. Trim excess dough with kitchen shears, leaving a 3/4 inch overhang. Fold the edge of the top piece of dough over and under the edge of the bottom piece of dough, pressing together. Flute edges using thumb and forefinger or press with a fork. Score the top of the pie with four 2-inch long cuts, so that steam from the cooking pie can escape.


Grape Pie Filling

Prep time: 25 minutes

Ingredients

  • 5 cups grapes
  • 1/2 cup water
  • Juice of 1 lemon
  • 1/2 cup sugar
  • 1/4 cup flour
  • A pinch of salt  
  • Egg white


Directions

1. Place grapes, water and lemon juice in a pan over medium heat and bring to a boil.  Boil, uncovered, for about 20 minutes.  Turn off flame.

2. Add sugar, flour and salt to grape mixture and whisk until there are no remaining flour lumps.

Set aside until crust is ready.  

3. Pour filling into first pie crust and top with second crust.  Brush top of pie with egg white.  

4. Bake at 400˚F for 45 to 50 minutes.

Enjoy!!

Thursday, May 26, 2011

Fern Gully: Part II

This past weekend Aaron's mom, Robin, came to town and gardening ensued.  In fact, Gardenstravaganza (that's what I'm calling it) is still going on.  Right now, I'll just focus on the ferns though.  If you're reading this, it is fairly likely that you have already read Fern Gully: Part I in which I told you about pulling out some ferns growing in the small front bed under our living room window.  Well, this post is about pulling out the biggest fern(s?) I have ever laid eyes on.  Now, like most people I tell my plans to, you maybe cringing at the idea of me removing large amounts of ferns.  You may be saying, "But ferns are so pretty," or "Oh, why are you pulling those out?  They're so expensive!"  Well, this behemoth had taken over most of a 5 x 15 foot bed and had overgrown a rose bush, two camellias and some plants I have yet to identify.


So this weekend Aaron and I got to work.  We got all of the ferns removed and hauled them to the dump (green waste, not landfill).  The largest piece we pulled out measured about 5 x 2 x 3 feet and some of the fern fronds were nearly 5 feet tall.  I'm sure they'll come back; sword ferns are tuberous and there were thousands of tubers/bulbs/whatever you want to call them underneath the mass of plants.  We removed all we could, but went down too deeply for us to reach them all.  I will be diligent in pulling new growth when I discover it.  And that's definitely 'when' and not 'if'. 


As you can see, having the ferns out makes a huge difference.  The rose bush is now without support, but it had fallen over in some strong wind we had a few days prior to the fern removal.  We just need to get it staked back up and it will be fine.  We still have a lot of work to go though.  Eventually we will be moving some of the white rose bushes (Iceberg) from the backyard into the bare place on the left.  We're hoping the camellias will fill out a bit as well now that they get more sunlight and have a little extra growing room.  The unidentified plants have beautiful flowers, but they multiply rapidly so they may eventually be replaced by another white rose bush so we don't end up with a bed full of those.

Wednesday, May 25, 2011

Cellar Door

Well, not a cellar really, but a pantry.  A couple of weeks ago I painted our pantry door with chalkboard paint.  It is the perfect place to write the menu for the week and remind ourselves of ingredients to put on the grocery list.

 Before:                                                                                                     After: