Friday, October 26, 2012

Bathing Beauty, Part III: The Shower Surround

The bathroom just before I started demolition.
The bathroom renovation has officially begun!  In the beginning of September Aaron and I started demolishing our old shower surround to put in new plumbing and tiles in the bathtub/shower combo in our only bathroom of the house.  This is the first actual work we've done in the bathroom, so we'll call it phase one.  (We've actually done quite a bit of work outside of the actual room that will eventually be moved into the bathroom, but I'll tell you all about those things later.)  Technically, Aaron replaced the tub drain and P-trap a couple weeks before this, but it wasn't very visible so it didn't really seem like we had officially begun.

We planned for four days of work to complete the tiling job.  Four days.  I'll pause here so everyone can have a good laugh at that.  Yep; we who had never done any work even resembling what we were planning to do thought we could re-tile our shower surround in a long weekend.  We were naive in planning that out.  We really did put some thought into it, we just overestimated our abilities.  Here is our plan as it stood at the beginning of our project:

Day One (Friday): Demo existing shower surround and install new plumbing.
Day Two (Saturday): Install new plastic sheeting, concrete backerboard, and new tiles.
Day Three (Sunday): Grout.
Day Four (Monday): Apply sealer and caulk.

The plan seemed logical enough and Aaron had taken Monday off work so that, if needed, we could grout on Monday and I could seal things up and caulk by myself on Tuesday.  We went in with the mantra, "expect the unexpected."  Plus, the temperature outside was in the triple digits (and was going to be for the next week) so the thought of using the hose to "shower" in the backyard was even appealing not horrible.  Spoiler alert: I'll just let you know now that this post does not end with a completed project, but it does end on day four.  Hang on for the bumpy ride!  (The story is wayyyy too long to tell in just one post.)

I began day one by starting the demolition while Aaron finished up his week at work.  My first swing of the sledgehammer yielded poor results.  Poor may be an understatement; there was not a crack in sight.  No big deal, I thought.  I quickly moved onto plan B, a hammer and chisel (aka, old flathead screwdriver).  It was after around 2 hours of work, at which point I had only removed about 3 square feet of tile, that I knew we had not been realistic with our timeline.

Aaron using the scraper attachment.
Then Aaron got home and busted out the reciprocating saw scraper attachment he had purchased (he neglected to tell me about said purchase before then) and after another 20 minutes or so the entire top level of mismatched, not original tile was gone!  Yay!  Just like that we were back on schedule.  And then all that unexpected we were expecting happened.

The scraper attachment didn't leave a mark on the original tile.  Aaron took his first swing of the sledgehammer.  Nothing.  Next up, the crowbar.  Still, not much happened.  While Aaron continued to slam and pry the wall to no avail  I decided to remove all the mirrors hanging against the other side of wall in the dining room.  About a minute after removing the last mirror and walking into the kitchen I heard a cracking noise.  Thinking Aaron had finally gotten the tile to crack, I started to go celebrate this little victory with him, but I soon found out the cracking noise I heard was not the tile. 

The hole in the dining room wall.
There, in the very spot where the largest (and most expensive) of the mirrors had been hanging was a hole in the wall with a stud poking through.  Aaron, oblivious to the hole, was still prying away in the bathroom.  After yelling some choice words I ran into the bathroom to stop him.  It turns out that the stud he was bracing the crowbar against was not very well attached to the rest of the wall and so instead of prying the tile off it pushed the stud through the other side of the wall. 

We quickly discovered the reason for the indestructible tile.  To say it was unexpected would just be wrong.  We didn't even know such a thing existed.  What we found was a 3-inch thick concrete mortar bed reinforced by thick metal mesh  attached directly through the backerboard and gypsum board (yes, both) to the studs.  For those not in the know, that means drywall (gypsum board) was applied to the studs.  This was covered by backerboard, which is a concrete wall board.  Then a piece of metal mesh was nailed through the two wall boards into the studs, then three inches of concrete mortar was applied over the top of that, and then the tiles were applied directly to the concrete mortar resulting in a nearly indestructible shower surround.  Who knew we had a bomb shelter in our house? 

A chunk of the three-inch thick wall.

Aaron chipped and pried away what he could and brought down all the tile/concrete/etc from the small wall with the plumbing.  That marked the end of work for day one.  Not only was demo not even near complete, but the plumbing wasn't done either.  We were still hopeful that we could finish by Tuesday.  We would just push everything out a day.  We already kind of planned for that anyhow, right?


The next morning, we woke up and got started on demo again.  After a couple maddening hours of chipping away flecks of tile and concrete Aaron was at the end of his wits.  I had long ago
exited the room, knowing I would have
The downed wall.
been useless and in the way.  All of a sudden I heard Aaron roar and the sound of something heavy moving.  I peeked into the bathroom only to find Aaron supporting the entire long wall of the shower.  He had gotten so frustrated at not being able to knock out the tiles and concrete that he was able to pull the whole thing out by hand.  Ummmm...... superhuman strength much, Hulk?  Now the conundrum became, "How do we get a several-hundred-pound wall out of our bathroom and into the trashcan?"  Well, Aaron just slung the sledge at the now-downed wall and, sure enough, in its weakened state it broke apart into manageable pieces.

Aaron finished knocking out the remaining tile/concrete/walls as well as the old plumbing and bagged everything up to go to the dump.  Aaron made a quick trip to the office to get the work truck and then loaded all the bags of refuse into the bed (thank you lift gate).  And just in case you think I might be exaggerating on the weight of this monstrosity, our trip to the dump yielded 1,100 pounds of refuse.  Three small walls around our shower weighed 1,100 pounds!  1,100 pounds!!  I literally just had to stop typing for about 5 minutes in order to re-process that bit of information. 

Hanging the plastic and backerboard.
Our friends Ren and Mike joined us later in the day to provide some much-needed entertainment and help.  (Thanks guys!!)  Aaron and Mike were able to install the new plumbing, but at this point, Aaron was so worn out from his morning of Hulking out that he decided to call it a day a little early.  I was useless at this point since I am unable to lift a sheet of backerboard by myself, let alone screw it up to the wall.  Well, add another day to the plan.  But that was fine.  I could grout by myself and then have things sealed, caulked and finished up by Wednesday.  No problem.

Sunday morning Aaron got the plastic barrier stapled up and started hanging backerboard.  His nerves were a little on edge at this point after straying so far from our original timeline so I stayed away to avoid an argument.  Plus, I knew my work was coming up in the form of tiling, grouting, sealing and caulking.


The over-looked space.
Our solution.
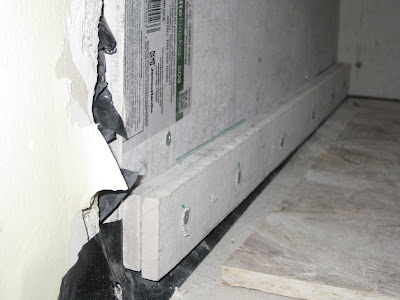
At about noon, Aaron had hung the all the backerboard, but I knew by the noises coming from the bathroom that there was a problem.  Put nicely, Aaron is not one to quietly troubleshoot.  He animatedly explained to me that the tub was not installed close enough to the wall.  You see, our old tile was sticking out an inch from the wall and we had decided to install our new tile just on top of the wall.  This meant our backerboard was flush with the regular wall leaving a space a little under an inch wide between the edge of the tub and the backerboard wall.  It had been overlooked due to being covered up by the piece of plywood
covering the bathtub to protect it
from falling objects and for us
shorties to stand on.

After a couple of minutes I came up with a solution.  I hesitated to even offer it up as it was not something I'd ever do by choice, but I saw little else in terms of options so we went with it.   (Now, nearly two months later I've yet to think of anything else, so I don't feel so bad about it.  There wasn't much we could do and we definitely weren't calling in the pros.)  We added  two more layers of backerboard about 2 inches tall along that end wall to create a small step out from the wall to cover the gap.  I had seen this done in older homes with new tiling jobs as a finished product, but I never even stopped to think about the reason it had been done.  I hate the way it looks, but what else could we have done?  After this defeat we decided to take a break and do our weekly grocery shopping.

When we returned home I went back into the bathroom to begin prepping for laying the tile.  It was at this point that I noticed the valves for the new faucet were sitting crookedly in the wall.  Our faucet system is of the three-handle variety (one knob for hot, one for cold, and one for the diverter) and the hot valve was sticking out farther than the cold valve.  It was not something we could see prior to the backerboard being installed and I felt bad telling Aaron about this, since he had spent all morning putting up the backerboard, but I knew neither of us would have been happy with the outcome had we left it crooked.  So down came that sheet of backerboard and we went to work adjusting the plumbing and reinstalling the backerboard.  At this point we were both tired and let down with the day's work.  We had fallen so far behind schedule that ending the day here just seemed like the best thing to do.

Applying mortar over the mesh tape.  I'm still smiling!
Monday morning I woke up and got to work filling the spaces between the normal wall and backerboard with mortar.  (We had a hard time making straight cuts through the old walls when installing the new backerboard so we had some large gaps to fill.)  After those were filled I taped and mortared the seams of the joined sheets of backerboard.  We left that to dry a bit and then Aaron did some sanding to smooth a couple of places out on the part of the wall that would be visible after putting up the new tiles.  We also took this time to measure our new wall space so we could adjust our plans for the tile pattern. By evening it was time to start laying tile, but I was mentally exhausted and stuck trying to figure out where to begin.  I over-analyzed myself into a frazzled state and so I decided to call it a night and hold off on tiling until the following day.

 So here we are at the end of day four.  At this point we had finished all the work up to tiling, something we thought we'd be done with on day two.  It took us four days to demolish the old shower surround, replumb, and put up new walls, yet we still thought the end was in sight.  We were so naive.

To be continued...

See Bathing Beauty: Parts I and II for before photos and our inspiration for the renovation.

Thursday, March 29, 2012

Bathing Beauty, Part II: Inspiration Strikes

If you haven't already, check out Bathing Beauty, Part I: Before Photos for a list of things I dislike about our current bathroom and, you guessed it, the before photos.  Our summertime bathroom renovation plan is getting closer!  And that means it is time to post inspiration photos I have gathered over the last few months.  Oh, who am I kidding?  I've been scouting out inspiration for this project since the week we moved in! 

It all started with this bathroom I found with a google search:

I really like this bright, open and airy coastal cottage bathroom. Photo by Deborah Whitlaw Llewellyn for Coastal Living. 

Next I came upon this beauty:

I love this all white bathroom.  All white can feel sterile, but this bathroom is warm and relaxed.  Photo by Jen Ross.

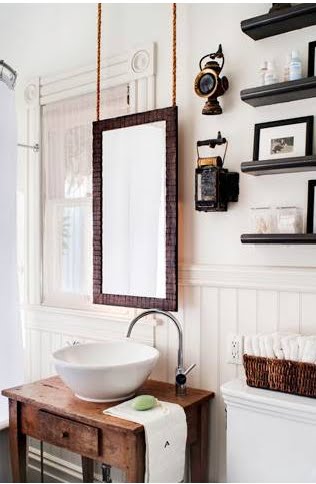
The next inspiring photo I found comes from Pinterest.  I can't find the source of the original photo, but this website offers the designer and photographer names (see caption under photo).

A weathered wood table lends a rustic feel to this otherwise cottage-style bathroom by designer Antonio Martins.  Photo by Drew Kelly for CA Home+Design.

The overarching similarity in these three bathrooms is a white palette with wood and metal tones thrown in for an unmistakable relaxed earthiness.  As with everything else, I have to put my spin on things and the bathroom is no different.  So without further ado, here is an inspiration board I put together:


1. This is the American Standard Studio Above Counter Sink.  I love sinks that sit on top of the counter and shallow is the way to go as we never fill the sink with water.

2. This curvy faucet from Elements of Design balances the straight lines of the modern sink.

3. The Tresham Toilet from Kohler is a beauty, but after reading something on another blog, Young House Love, I may consider purchasing an American Standard instead.

4. This bathtub looks exactly like ours and is here to represent getting ours refinished.  Hopefully there won't be any hiccups in that plan.

5. These Pfister shower valve knobs are what we already have in our bathroom and we love the style.  We'll be replacing the broken and stained knobs with these from Lowe's.

6. We're thinking of going with a deep and vibrant coral color for the towels.

7. and 8. White subway tile from Home Depot will cover the shower walls up to the ceiling.  We will install a thin, black line with these tiles from Lowe's.

9. This Crate and Barrel Pavillion [Sic] Black Wall Mirror is a dead ringer for a mirror I found at DD's Discounts for $30 a few months ago.

10. This vanity from the Sept. 2007 issue of Canadian Home and Country Magazine has inspired Aaron and I to build a glossy, black vanity of our own.  Ours will have two drawers in the apron and only one sink in the middle.  We will use glossy, water-sealed butcher block for the counter top.

11. We are thinking of hanging two of these Laboratory Glass Pendants by Shades of Light on either side of the mirror to achieve the best lighting possible.  (That's one of the only things right about our bathroom in its current state.)  Pendant lights hung along the sides of the mirror light the face without casting too many shadows.  The clear glass will keep the pendants from looking too heavy.

12. This is our preliminary choice for the wall color.  It is Feather Gray by Behr.  If it looks too drab once we paint then we'll spring for something else, but we're hoping that the taupe-y lavender tones stand out nicely next to bright white tile and trim.

13. Last, but not least, are these 1" white hex tile floors from Merola.  We've read that matte tile picks up every little mark so we'll find glossy hex tile when we really start shopping around.  We know it's out there!

One other thing I want to mention is that because we're opening up the vanity, we have plans to build a cabinet for above the toilet to add back a little of the lost hidden storage (rather than open baskets on shelves under the sink).  This is my inspiration for that cabinet.  Ours will probably be black or white and I hope I can find a deep coral fabric to back the door with like Emily did below.

Emily and Erick Henson's Bathroom featured on Apartment Therapy.  Photo by Bethany Nauert.

Did I say one more thing?  I meant two.  We may also put up something that evokes board and batten (see below) or bead board (see photo above) walls for the non-tiled portions.  Check out this simple project!  The original image is from HomeGoods Blog, but they don't permalink their projects so you can slog through to find it on your own time.  I found it for anyone who is interested; it was posted on July 31, 2011.  If I remember correctly, the homeowners found 1" x 4" mdf boards at their hardware store, painted them, and glued/screwed them to the wall to achieve the board and batten look.


That's it for now.  I can't wait to get started on this project!  I'll keep y'all updated as it unfolds!

Monday, March 26, 2012

Bathing Beauty, Part I: Before Photos

As many of you know, I can't wait to demo our only bathroom.  So many people who see it knowing that I want to redo it say something along the lines of, "Oh, that's not so bad."  Well, guess what?  I think it is awful.  I will now detail some of the changes it has gone through since we moved in a year ago.

Here's a picture of it the day we moved in.

April 2011
The first thing to go was the frosted glass door with see-through flowers.  There is nothing I hate more in a bathroom than a sliding shower door.  Not only am I opposed to the look of them, but they make me feel so boxed in.  At least a shower curtain moves when you elbow it!  (Also notice the shower curtain rod hung above the door.  See?  Even the previous owners didn't like the door.)  So, after much complaining, I decided to take matters into my own hands and one day while Aaron was at work I unscrewed it and hefted it out to the garage.  I peeled away as much of the caulking as I could and called it a day.

The next things to go were the curtains.  The teal/gray floor tile is leftover kitchen tile and I'm guessing, since it doesn't match anything else in the bathroom, the previous owners wanted to tie the floor in with matching teal/gray curtains.  Not what I would have done, but the curtains were easy enough to remove, so down they came.


September 2011

 Here is a picture five months after we moved in.  Notice the new shower curtain (since replaced with a clear curtain) and the absence of window curtains.  The next change was part of a whole house spruce up.  We had new windows installed and rather than replacing the old casement window with a new casement window, we opted instead for a double-hung window with the same privacy glass (the pattern is called smooth-rough, but also sometimes goes by the name Flemish Obscure) as the old window had.  The old casement opened into our backyard and when it was open you could see right into the bathroom.  With the double hung window we can open it from the top down when guests are over and we have the other windows open so the bathroom remains private, but still breezy.


March 2012

That brings us to the current state of things.  Let me give you a list of a few of the things I really dislike that still remain.

1. 'Lemon Meringue' Yellow and Forest Green tiles.  Don't get me wrong here, I love vintage tiled bathrooms, just not when the colors clash so badly.  Some of them are cracked also.

2.  The extra tiles.  I'm referring to the mismatched tiles that have been thrown in by those looking for a change without any demo work.  You'll be able to see some other extra tiles in the shower in photos below.

3. The lighting.  They are fake crackle glass balls hanging from rusted chain and with decaying ground wires. (Sounds safe, huh?)  So many people like these upon getting 'the tour', so I guess to each his own.  Two people have already asked for them when we take them down.

4. The almost-there paint color.  I call it "Muted Highlighter".  It's hard to see in the pictures, but the paint color is just the wrong color.  Someone tried to match the tile.  His or her eyesight must have been pretty horrible because he or she made a bad decision. 

5. The plywood vanity.  Enough said.

6. The tub that got drenched with acid and scoured with steel wool and now has grey speckles.  You know how bathtubs, when clean, tend to sparkle and shine?  Ours doesn't.  Don't be deceived by the front facade; it wasn't cleaned in the same manner as the inside.  Just wait for the pictures on this one.

7. No towel bar for the hand towel.  There used to be a towel ring over by the toilet (which is behind the door).  I took that out before the furniture was even moved in.  Gross.

8. The door swings the wrong way.  It opens in to the bathroom, which is correct, but instead of opening against the wall, it opens against the toilet.  Inconvenient to the max.  Especially for the two of us who don't close the door when we use the bathroom (unless we have company, of course).  Did I go too far with that?  Oh well.

Now let me illustrate some of these in pictures.


Those are the extra tiles I spoke of, the toilet behind the door, damage from taking down the shower door, the plywood vanity with a dark stain, various cracks in the tile, and the non-shiny bathtub.  I would like to put in a disclaimer here that we do clean our bathtub.  It holds on to dirt because it has no finish.  Those marks won't come off.


I hope some of you will better understand why I want to gut the sucker now.  We're hoping for a Summer 2012 renovation.  I'll keep y'all posted along the way with updates and pictures as they happen.  Next up: Inspiration Strikes!

Monday, March 5, 2012

An Open-Shut(ter) Case

Our new shutters!

Months ago I had the idea to add shutters to the two windows in our garage.  They face the street and while they don't attract a lot of attention, I thought adding shutters would be a fun way to add a little color to the front wall of our house.

Cottage-style board and batten shutters.
I looked at a lot of pictures both on Pinterest and with Google image searches and decided to go the cottage-y route with board and batten shutters.  I also decided this


was a simple project Aaron and I could do on our own.  Board and batten shutters, for those who want to know, are simple, vertical wooden slats with two horizontal slats holding the vertical slats together.  While searching for inspiration I also came across a very informative website about proper and improper sizing and installation of shutters.  While our shutters won't be functioning shutters, I still want them to be the proper proportions for our windows. 

I didn't want to spend very much money on this project so I chose to use cheap cedar fence pickets for construction and the leftover bright plum paint (Martha Stewart Plum Pudding color-matched to Behr paint) we bought for the front door and side gates for color.  I only had to buy seven fence pickets at about $1.50 a piece so my total was only about $10.  Pickets come in very select sizes so this meant the shutters wouldn't be the perfect size for functionality, but the small price tag far outweighed my desire for correctness.

The wood was very wet when we purchased it so we cut it to our desired length and screwed the pieces together, but waited to paint until everything had dried out.  While the wood was drying we also bought new windows so I decided to wait to do anything else for this project (aside from painting) until the new windows were installed.

Constructed and drying.
Primed and first coat of paint.

Once the new windows were in and the wood had finally dried out I was able to paint. Two coats of primer followed by two coats of paint did the trick as far as prepping the shutters for installation and after a week of dry time for the paint, Aaron and I were able to hang the shutters in under 30 minutes.

Our house before, without shutters. (Excuse the poor lighting.)


Our house after, with shutters!

We love them and the neighbors have already complimented us on them as well.  I think it just gives that 'finished' look to the front of our house.  It brightens up a bland wall and closes some of that blank space that just looks lonely.  To quote myself during the installation process, "It's like we've added eyelashes and mascara all at the same time!"  It is simple projects like this that make me so happy.  We've added some major curb appeal (at least in our eyes, which is the important perspective) for only $10!  You can't beat that!

Early on I had considered adding hinges and hooks for that look of functionality, but once the new windows were in I realized the windows weren't butted up against a solid frame, but were instead floated in place leaving an open space surrounding the actual window.  The open space is covered by a vinyl front, but there is nothing solid to screw the hinges into, so that idea went out the window.  (Ha, no pun intended, but consider it enjoyed!)

All in all, we're very pleased and can't wait to tackle our next project!

Thursday, January 5, 2012

Winter Spring Cleaning

My Purple Heart nearly taken over by Oxalis.
The temperatures over the last week or so have ranged from the 40s at night to the 80s during the day.  That's perfect weather for Aaron and I to start working on a huge list of garden-related chores.  Right now it's 82 out and I couldn't help but do some spring winter cleaning.  The list of yard chores includes:

-new flower bed digging and planting
-removal of some plants that were planted in bad places by the previous owners
-fruit tree pruning
-weeding (we're overrun by Buttercup oxalis, aka Bermuda Buttercup, aka Demon Weed - no joke!)
-moving a few plants from one spot to another
-moving the compost bin
-moving the herbs closer to the house
-planting a tree in the front yard (I think we're going with a Peppermint Willow, aka Australian Willow Myrtle!  I'm really excited about this one!)
-pulling out the old tomato plants (Would you believe they're still fruiting?!)
-washing the back patio of persimmon muck
and
-some major pruning of plants gone wild.

One of the Lantana I heavily pruned and the pile of trimmings.
Today I got most of the plant pruning done (not counting the fruit trees); I went to town on some wily Lantana and cut out an old Holly tree/bush that wasn't doing it for me.  The compost bin will eventually be moved to the spot where the Holly once stood.  I also did a bit of weed removal and did the initial spray-down of the back patio.  The persimmons that had fallen had also began baking onto the patio and table creating a kind of fruit leather-ish mess spread across the pavers, rocks and table.  I worked at it for a while, but will have to have another go at it at a later date.

The (mostly) cut down Holly tree/bush.

While this weather is amazing for yard work I am mourning the loss of our winter season.  Hopefully the weather will revert back to winter over the next few months; this girl needs her four seasons!

Happy gardening!  And here's hoping we get most of the chores done before real spring is upon us!